micro:bit Python Basics
Let's get started programming the micro:bit using MicroPython
Introduction
This is some simple examples programming your micro:bit using micro:bit Python. We will keep it at a beginner level this time. The goal is for you to connect to your micro:bit and get started.
Let's get started
First of all, it is time to connect your micro:bit to your computer. Use the provide USB to microUSB cable to connect your micro:bit to your computer. The factory example will start playing, and you can interact with it if you like to. When you are ready to start programming it with your own stuff, follow this guide.
Set up the Project Environment
Let's set up the Project Environment so you can start writing code and flash it to your micro:bit. If you are doing this together with your kids, I recommend using the web-based micro:bit Python editor. If you have some Dev experience, follow along with the VsCode chapter. There are some really cool extensions which get the job done. For true ninjas, do the first steps to initialize the Project Environment in VsCode. Then move on to the Neovim chapter.
Web-based micro:bit Python editor
-
Open the micro:bit Python website.
-
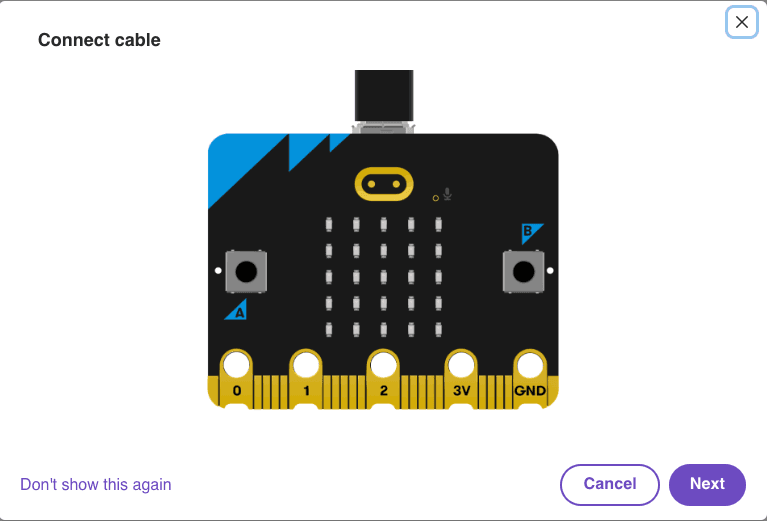
Make sure your micro:bit is connected with the provided cable.
-
When you open the web editor, there is an example code for writing "Hello" and displaying a heart on the LEDs of your micro:bit.
-
Click "Save". Select or create a folder on your computer to contain the Project Environment.
-
Let's connect the Project Environment to the micro:bit:
-
In the bottom left corner, click on the 3 vertical dots.

-
Click Next.

-
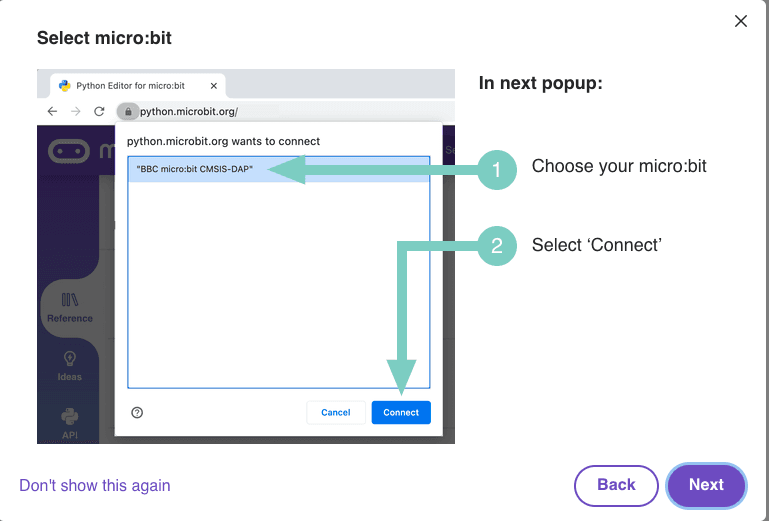
Click Next.

-
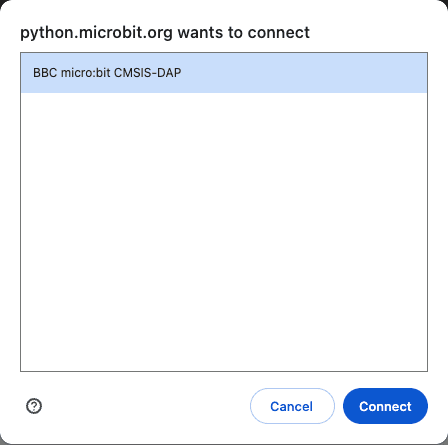
Mark the detected micro:bit and click Connect

-
If the connection is successful, you should see the following line under your code:

-
After following these steps, you are ready to start coding your micro:bit using micro:bit Python Web Editor. You can test using the virtual micro:bit on the website or try to send the code to your micro:bit later in this post.
Using VsCode
If you have some Dev experience and want to set up your Project Environment like you do on your job, you can use a proper IDE like VsCode with some extensions enabling Intellisense and sending your code to your micro:bit.
Extensions.
First of all, you need an extension for micro:bit Python:
- Open VsCode.
- Go to Extensions and search for micro:bit Python by MAKInterakt. Select Install.
- Restart VsCode
Initialize
- In VsCode, Select "Open". Create a new folder for your Project Environment, f.ex "HelloWorld"
- Once inside the folder, press "Shift-Cmd-p" to open the Command Menu. Search for micro:bit-python: Flash MicroPython environment on micro:bit and press Enter. This will install the necessary firmware to run micro:bit Python on your micro:bit.
- Run micro:bit-python: Initialize the workspace. This will add the folder "./microbit" to your Project Environment, enabling Intellisense code auto completion.
You are now ready to write code in VsCode
Using NeoVim and Terminal
If you truly are a Terminal lover and Keyboard Ninja, it is definitely possible to use Neovim to write micro:bit Python. This is recommended for Devs who are used to writing Python code in Neovim, and have the necessary LSP's, Linters and Formatters in place. You need to install the uflash module for Python, requiring a Python Virtual Environment to follow best-practices.
Initialize the Python Virtual Environment
- Run the Initialize steps for VsCode in the chapter above. In your next project, get you only need to copy the ./microbit folder from a previous Project Environment to your new one.
- Run the following bash / zsh lines to set up the Python Virtual Environment:
sudo python3 -m venv . source ./bin/activate
- Run the following bash / zsh line to install uflash:
sudo pip install uflash
You can now start coding. Just create the python file using touch main.py and then nvim main.py
Writing code
Let's write some code and have a bit of fun!
Display some text on the micro:bit LEDs
In this example, let us make the micro:bit greet us.
from microbit import *

display.scroll("Booyakasha!")
Deploy using the Web Editor
The Web Editor is the easiest way to deploy code to your micro:bit when no IDE is installed. Simply click the Send to micro:bit button when done.

Deploy using VsCode
You can use the micro:bit Python by MAKInterakt extension to deploy code to your micro:bit:
- Save your code, make sure to name it main.py.
- Press shift-cmd-p to search for command. Select micro:bit-python: Flash sketch on the micro:bit. and press Enter to run.
Deploy using Neovim and Terminal
The uflash utility can deploy python files to the micro:bit using the Terminal interface:
- In neovim, press :w to save the python file.
- In Terminal, run the command
uflash filename.py
More code
In the last example, a message is displayed on the micro:bit LEDs once. Now, let's make sure the message repeats as long as the miro:bit is powered using an Infinite loop.
from microbit import *

while true:
    display.scroll("Booyakasha!")
Summary
This was an introduction to programming the micro:bit using micro:bit python. There are many ways of doing it, I have covered some of them. There are other tools as well, whatever floats your boat. Have fun playing around with your micro:bit, I hope this post can help you get started.